Mezzotint Tools
Printmakers have been making a variety of tools and jigs for many years to aid in the rocking process for mezzotint. There are many variations on pole rockers;
even ones that are machine operated. Since 2006, Julie has been hand crafting and selling her mezzotint jigs internationally.
Mezzotint Pole Rocker Jig

Mezzotint Pole Rocker Jig
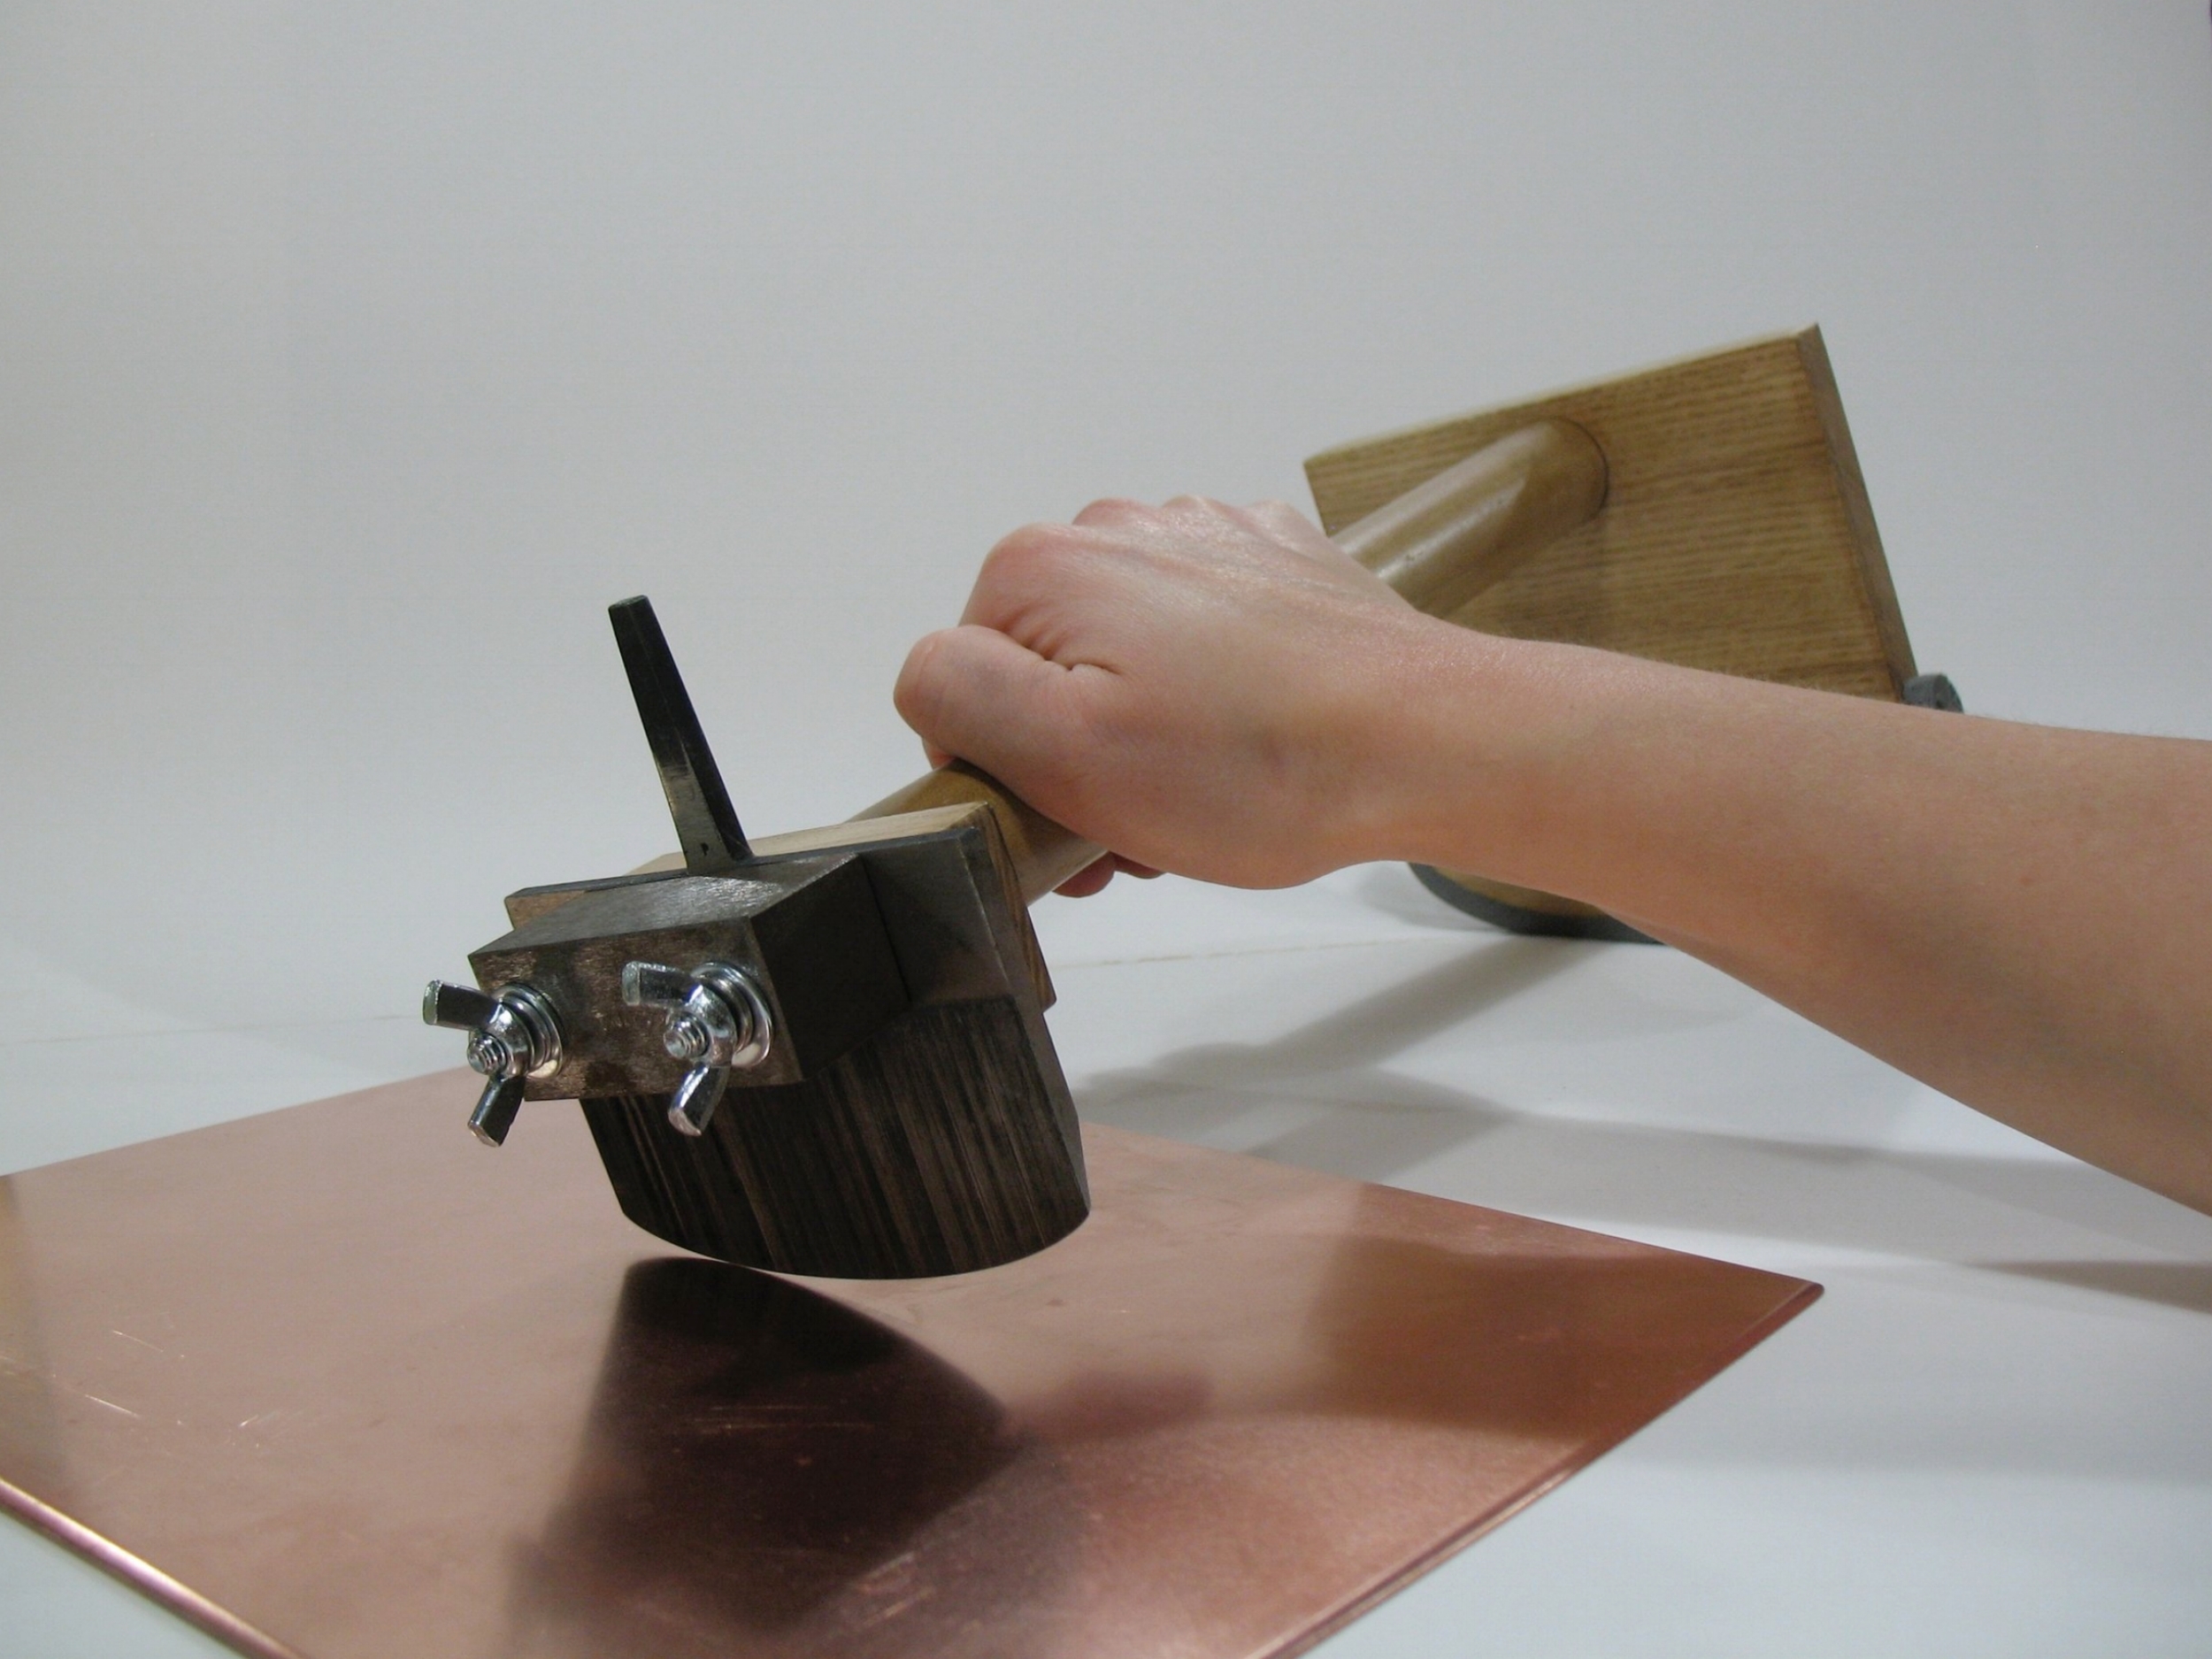
This tool for rocking plates is very sturdy and mobile (unlike the long pole designs). It helps rocking go much faster and it also helps to get a nice even pass; and of course it is much easier on the hand, arm, and wrist versus hand rocking. These pole rockers can be used to rock plates as small as 3 x 3 inches and as large as 18 x 24 inches (or at least that is the largest I have rocked).
These pole rockers are made to specifically fit the size rocker that is used (from 3 to 6 inches). The length and width of the tool are constructed to give your rocker the perfect angle and curvature for rocking.
The pole rockers are hand built out of ash wood (a nice sturdy, hard wood), sanded, spray lacquered, and assembled with dowel pins. Rubber is adhered along the bottom of the wood to keep it from sliding around while rocking. This helps the rocking to stay consistent. Padding is put on the pole to make rocking a bit more comfortable.
Wing nuts are used to make it easy to remove and attach the rocker blade. It is also a good idea to buy some of the non-skid mat (found with contact paper and drawer/cabinet liner at Wal-mart or a hardware store). I always keep some of the non-skid mat under the back wooden side of the pole rocker to help keep it from sliding around as well as under my copper plate. It is also good to use if you are rocking larger plates – to put under the curved wooden end of the pole rocker as you rock your way across the plate. This protects the parts of the plate that have already been rocked from getting damaged.
Using the rocker jig:
Bolts should go through the two holes with a washer at the head of the bolt.
The rocker blade goes on first, with the teeth facing out.
Next put the weight onto the bolts.
Put the other washer on against the weight followed by the lock washer and wing nut. Make sure to tighten wing nuts down before rocking (it may help to use a wrench to hold the head of the bolt in place while you tighten the wing nut).
If you are used to hand rocking, rocking with the jig may feel awkward at first. It takes some getting used to, but you will never want to hand rock again! Rock with a back and forth motion while applying light pressure both down and forward, but don’t try to rock too fast or push it forward too aggressively. This will cause inconsistent rocking and open spacing between rocked strokes. The pole rocker is designed to give your rocker blade the correct angle for rocking, which also helps the rocker to move itself forward. Once you get a feel for rocking with the pole rocker, you will see that you can get tighter and much more consistent rocking. You will also be able to rock faster than hand rocking. This device is also much easier on the hand and wrist.
Sharpening Jig


Sharpening Jig
The sharpening jig works for all size rockers (from 1/2 inch to 6 inches). The jig keeps the rocker blade at the perfect angle and makes sharpening go very fast. You can even bring back missing teeth on the rocker blade.
The top point of the rocker blade fits into the hole of the sharpening jig. A threaded metal insert is in the end of the pole, and the thumbscrew can be tightened down so that the rocker blade doesn’t move while sharpening. To remove the rocker blade from the wooden handle to sharpen the blade, use a rubber hammer and gently tap the top edge of the rocker blade while holding the handle and the blade will come out from the handle. Then you can fit the rocker blade into the sharpening tool. Once sharpened you can wedge the blade back into the handle if you prefer hand rocking your plates.
The most important thing is making sure that you are sharpening your rocker at the correct angle. Sometimes you may need to slightly raise the height of the stone to get the perfect angle. With a Sharpie marker, go along the bevel of the rocker blade so that it is black. Then lightly sharpen the rocker. Check to see if the Sharpie is off the entire surface of the bevel. If it is, then you have it at the correct angle. If there is Sharpie left along the front or back edge of the bevel, then you need to adjust the angle. You can adjust the angle by slightly raising the sharpening stone or by placing a thin book or copper plate under the bottom end of the sharpener.
Make sure to use oil on the stone (I use 3-in-1 oil from the hardware store). You sharpen the blade on the stone by moving the rocker in a circular motion while also going back and forth (left & right) along the rocker blade. Apply downward pressure while sharpening. Sharpen on the rough side of the stone until the teeth feel fairly sharp. Then you can finish sharpening on the smoother side of the stone.
Price List
Mezzotint Pole Rocker Jigs:
*Please note- if your rocker blade is not made by E.C. Lyons, please send me the details to make sure these tools will work with your rocker blade.
Wooden jigs do NOT include rocker blade or weight. You will need to purchase these separately from Graphic Chemical or E.C. Lyons.
Wooden pole rocking jig for a 3” blade: $50 plus shipping
Wooden pole rocking jig for a 4” blade: $53 plus shipping
Wooden pole rocking jig for a 5” blade: $56 plus shipping
Wooden pole rocking jig for a 6” blade: $60 plus shipping
Mezzotint sharpening jig (works for any size rocker): $19 plus shipping
If you are interested in purchasing any of these tools, please use the form below to submit your order and information. I will be in touch and send an invoice once I have a shipping quote from the post office.
Please allow 7-14 days for your products to be hand crafted and an additional 5 days for shipping.